


Post by dgc on Jul 22, 2013 17:32:47 GMT 2
Hi Everyone,
I know there are various alternatives to replace the original Niva winders. I've used Toyota Tazz winders and they work great. They're also VERY easy to fit.
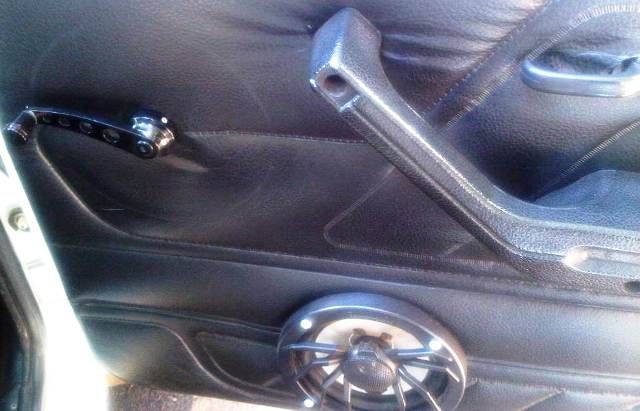
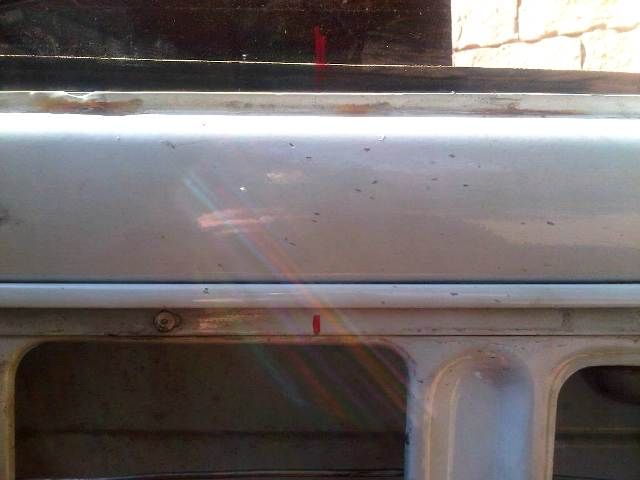
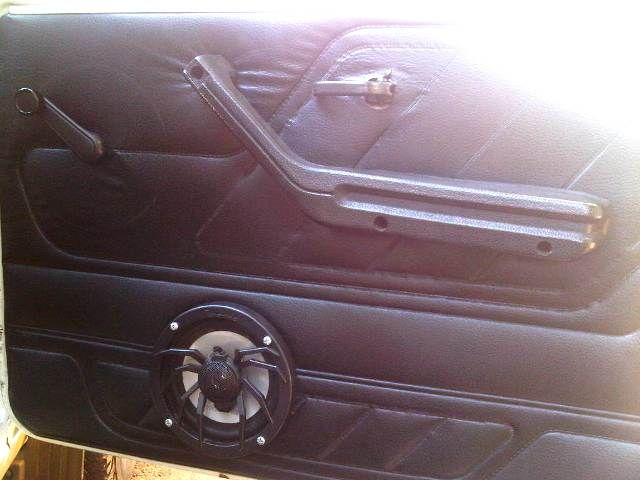
Old winder still working but creeky...
Step 1
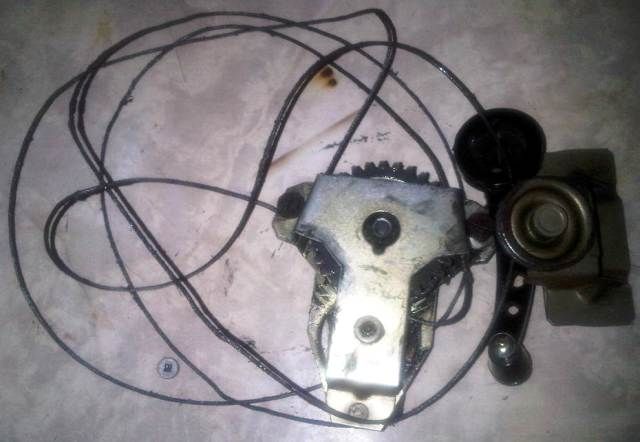
Remove the old winder as well as the window.
Step 2
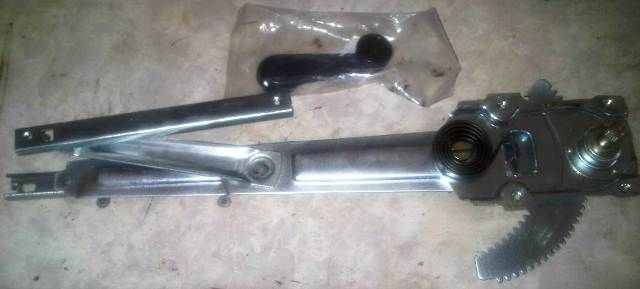
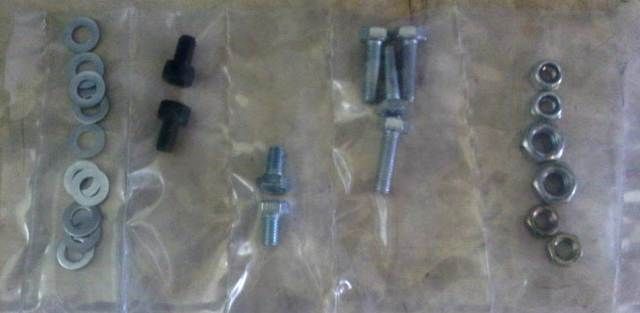
Make sure you have all the new hardware ready
1 x Toyota Tazz window winder mechanism
1 x winder handle
4 X M6x20mm bolts
4 X M6x10mm bolts
2 X M6x10mm allen cap screws
4 X M6 nylock nuts
2 X M8 nuts
10 X M6 washers
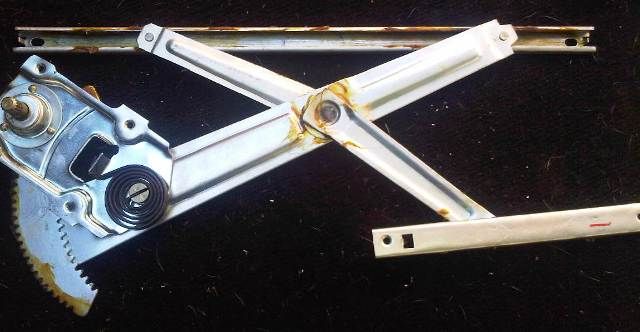
Step 3
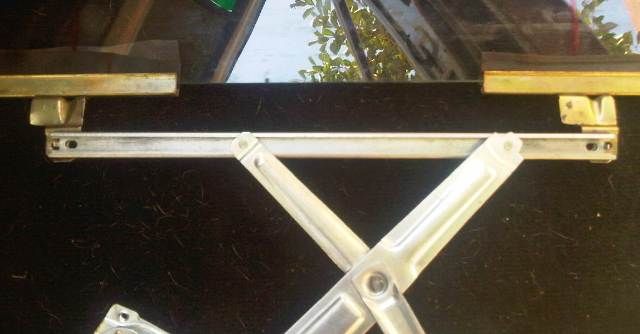
Adjust new winder mechanism to maximum height and lay out as to be fitted
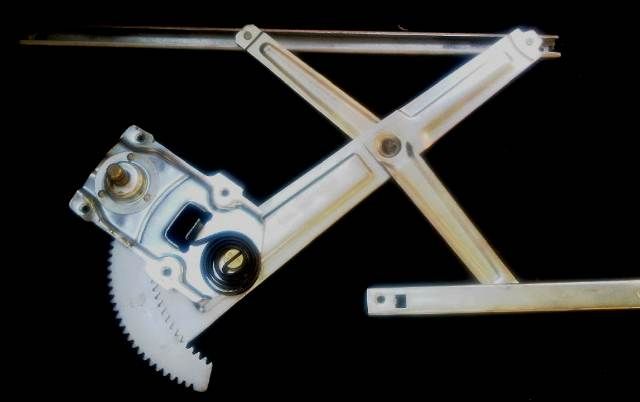
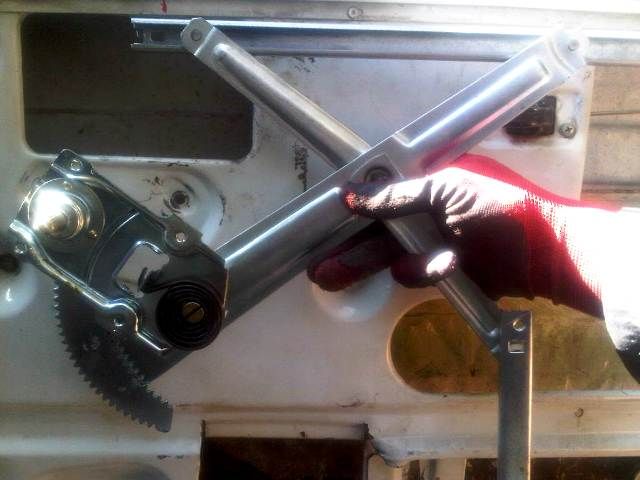
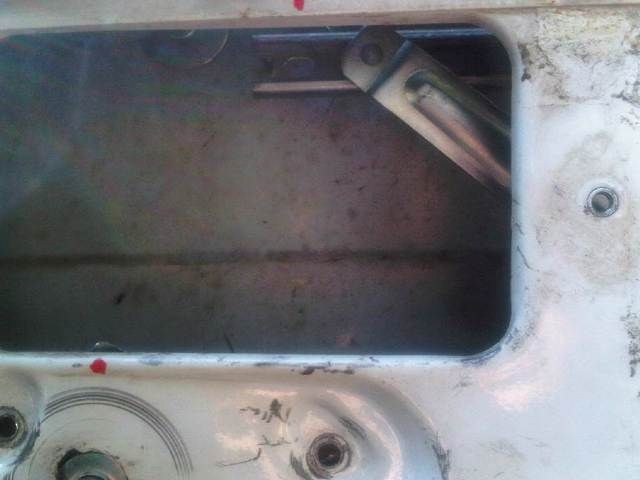
Step 4
Fit inside door in position showed in the next photo
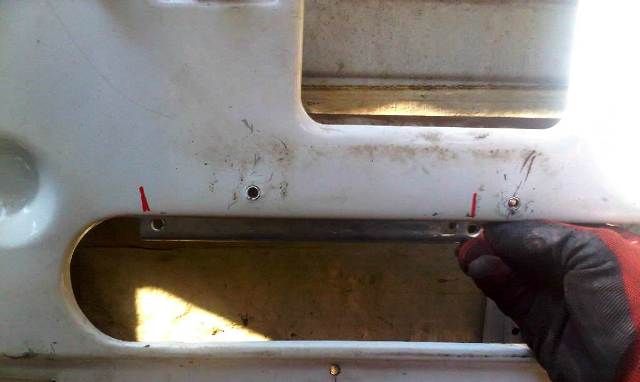
Step 5
Use a marker to mark one of the mounting holes (see red dot)
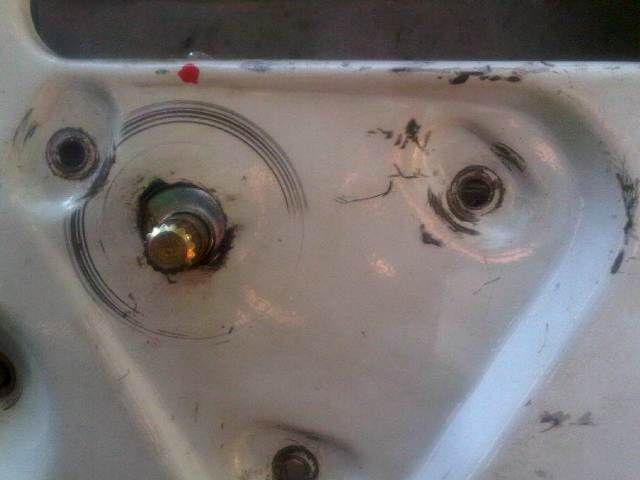
Step 6
Use a marker to make a mark in line with the hole for the window support bracket (see red line)
Markings for Step 5 and Step 6 (see red marks)
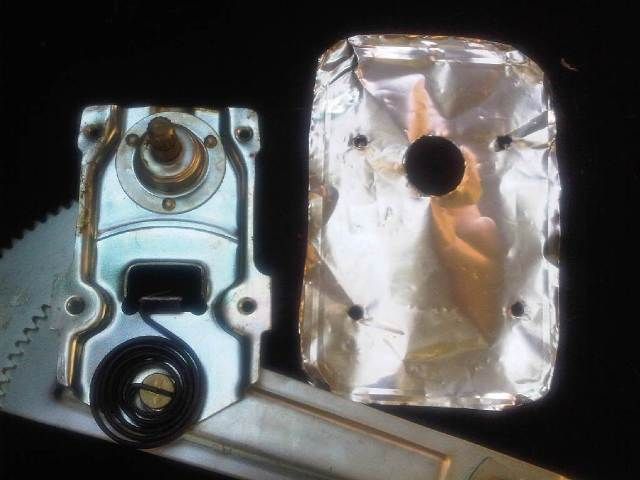
Step 7
Remove winder mechanism. Make a template of holes and winder shaft
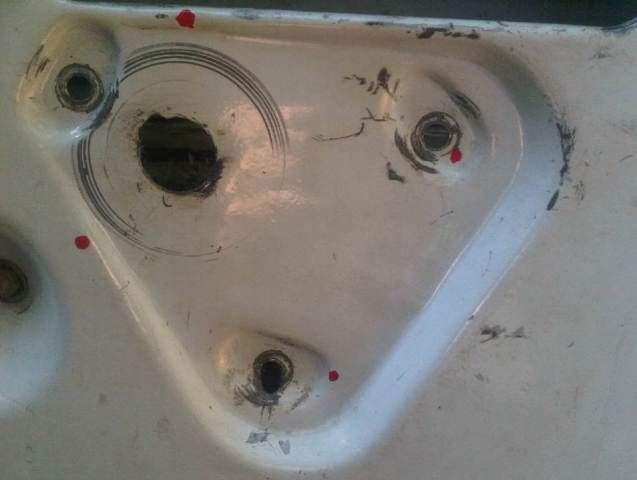
Step 8
Place template over hole in door for winder shaft, line previously marked hole up and use market to mark the other 3 holes
Holes marked
Now drill holes to 6mm
Step 9
Use window support bracket to make a mark in line with the other hole (see red lines)

Step 10
Remove support bracket mountings from window and clean the window. Don't stress if the rubbers tear, it's easy to make replacements from an old car tube.
Step 11
Refit the window into the door (without support bracket mountings as they were removed in Step 10) Use a marker to make marks on window in line with marks made in Step 6 and Step 9

Step 12
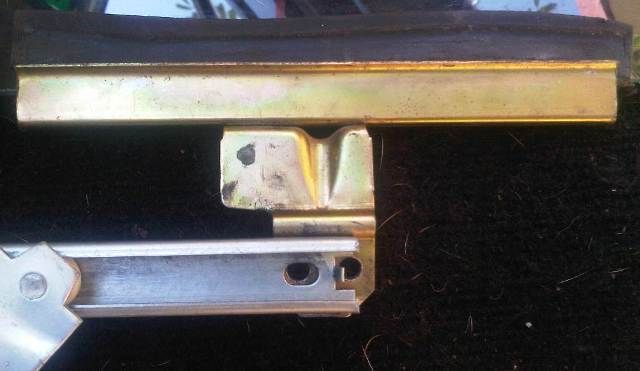
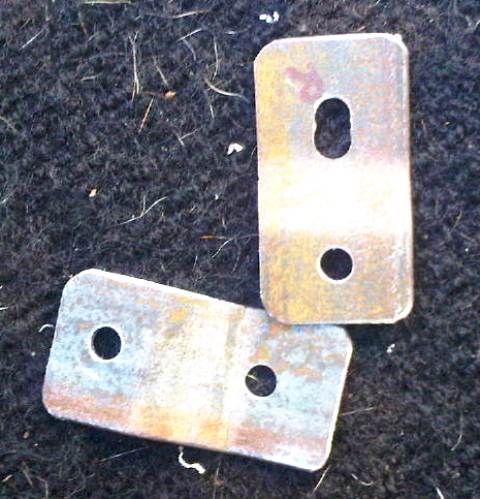
Remove the window from the door again. Line the support bracket mounting hole up with the mark made on the window. Use the window support bracket to ensure the support bracket holes and spaced correctly. Fit the support brackets partially until your sure the holes are correctly spaced. Then lightly tap the brackets back onto the window using a rubber mallet.
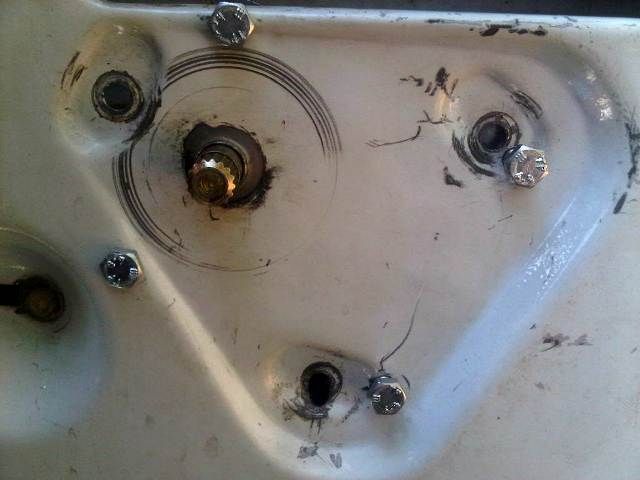
Hole should have been drilled to 6mm. Notice how red marking on window lines up with hole.
Step 13
Refit the window. Fit the window winder mechanism and ensure mounting holes line up correctly. Only hand tighten mounting bolts. Use M6x20mm for the 2 holes closest to the winder shaft and use M6x10mm for the holes that are furthest from the winder shaft. The 2 x M8 nuts will be used as spacers between the door and window winder mechanism where the M6x20mm bolts are used.
Insert bolts to hold window support bracket onto support bracket mountings. Nip these tight with 10mm socket.
Step 14
TEST
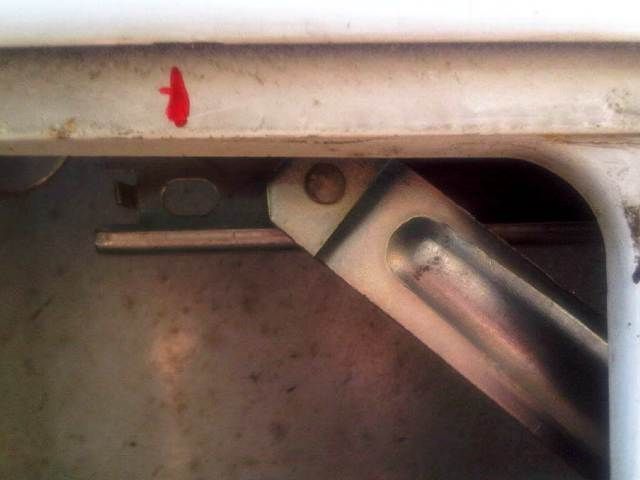
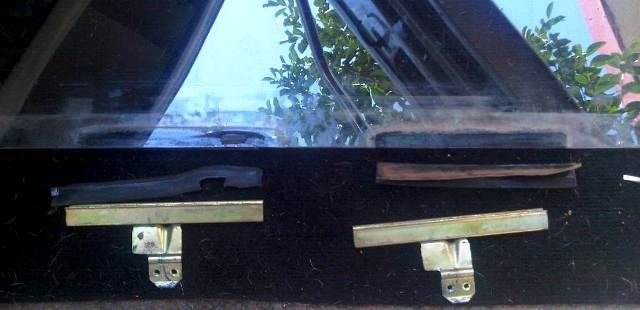
Step 15
Hold lower guide level and use marker to make mark in line with holes (see red lines)
Step 16
Remove window winder mechanism. Drill 2 x 6mm holes to mount lower guide to door. Make suitable brackets to bolt lower guide onto door.
Step 17
Apply grease to all friction surfaces on window winder mechanism and refit window winder mechanism.
Step 18
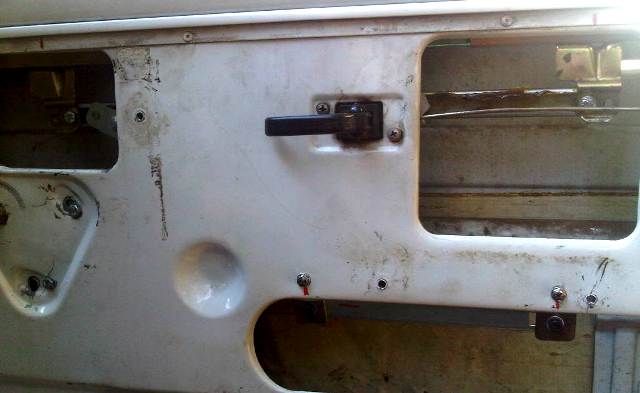
Bolt everything together.
Step 19
FINAL TEST - Should be 100s
Step 20
Replace door card and clean up the grease fingerprints.
I know there are various alternatives to replace the original Niva winders. I've used Toyota Tazz winders and they work great. They're also VERY easy to fit.
Old winder still working but creeky...

Step 1
Remove the old winder as well as the window.

Step 2
Make sure you have all the new hardware ready
1 x Toyota Tazz window winder mechanism
1 x winder handle

4 X M6x20mm bolts
4 X M6x10mm bolts
2 X M6x10mm allen cap screws
4 X M6 nylock nuts
2 X M8 nuts
10 X M6 washers

Step 3
Adjust new winder mechanism to maximum height and lay out as to be fitted

Step 4
Fit inside door in position showed in the next photo

Step 5
Use a marker to mark one of the mounting holes (see red dot)

Step 6
Use a marker to make a mark in line with the hole for the window support bracket (see red line)

Markings for Step 5 and Step 6 (see red marks)

Step 7
Remove winder mechanism. Make a template of holes and winder shaft

Step 8
Place template over hole in door for winder shaft, line previously marked hole up and use market to mark the other 3 holes
Holes marked

Now drill holes to 6mm
Step 9
Use window support bracket to make a mark in line with the other hole (see red lines)

Step 10
Remove support bracket mountings from window and clean the window. Don't stress if the rubbers tear, it's easy to make replacements from an old car tube.

Step 11
Refit the window into the door (without support bracket mountings as they were removed in Step 10) Use a marker to make marks on window in line with marks made in Step 6 and Step 9


Step 12
Remove the window from the door again. Line the support bracket mounting hole up with the mark made on the window. Use the window support bracket to ensure the support bracket holes and spaced correctly. Fit the support brackets partially until your sure the holes are correctly spaced. Then lightly tap the brackets back onto the window using a rubber mallet.

Hole should have been drilled to 6mm. Notice how red marking on window lines up with hole.

Step 13
Refit the window. Fit the window winder mechanism and ensure mounting holes line up correctly. Only hand tighten mounting bolts. Use M6x20mm for the 2 holes closest to the winder shaft and use M6x10mm for the holes that are furthest from the winder shaft. The 2 x M8 nuts will be used as spacers between the door and window winder mechanism where the M6x20mm bolts are used.

Insert bolts to hold window support bracket onto support bracket mountings. Nip these tight with 10mm socket.
Step 14
TEST
Step 15
Hold lower guide level and use marker to make mark in line with holes (see red lines)

Step 16
Remove window winder mechanism. Drill 2 x 6mm holes to mount lower guide to door. Make suitable brackets to bolt lower guide onto door.

Step 17
Apply grease to all friction surfaces on window winder mechanism and refit window winder mechanism.

Step 18
Bolt everything together.

Step 19
FINAL TEST - Should be 100s
Step 20
Replace door card and clean up the grease fingerprints.


 I can use low range AND T/C lock


